Crock Pot Honey Sesame Chicken

Welcome back, crock pot!  I love, love, love the crock pot, I just don’t use it enough.  So easy and I love the way the house starts smelling good halfway through the day!

I love Chinese food, but it’s typically not very good for you, so when I found this recipe on Pinterest, I adapted a bit to make it a little healthier and it was so good.  Another kid and family-friendly dinner.  It was also super-cheap; I had everything but the chicken already in the pantry.  Let me know what you think!

  • boneless, skinless chicken breasts
  • little less than 1/2 cup honey
  • 1/4 cup soy sauce
  • 2 tbsp diced onion
  • 2 tbsp ketchup
  • 1 tbsp vegetable oil
  • 1 garlic clove, minced
  • red pepper flakes (optional)
  • 2 tbsp cornstarch dissolved in 4 tbsp water
  • sesame seeds

Season chicken with salt and pepper on both sides and then place in the bottom of a crock pot.  In a small bowl, whisk together the honey, soy sauce, ketchup, onion, vegetable oil, garlic and pepper flakes.  Pour over chicken and cook on low 3-4 hours or on high 1.5 – 2.5 hours.

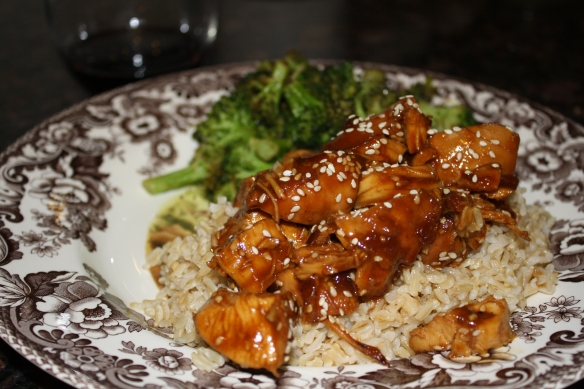
When chicken is cooked, remove and chop into bite size pieces.  In a small bowl, dissolve cornstarch with water and then stir into sauce still in crock pot.  Replace lid and cook on high for 10 minutes or so, until the sauce thickens a bit.  Once thickened, toss the chicken pieces with the sauce in the pot.  Sprinkle with sesame seeds and serve over brown rice and roasted broccoli.

Hamburger Casserole

This recipe is definitely one of the more kid-friendly dishes I have.  Who doesn’t love hamburger meat and cheese?  It’s very easy to prepare and a great recipe to double and freeze so you can pull out dinner in a pinch.  This is also a great meal to take to someone with a new baby, as most guys love it and leftovers re-heat really well.

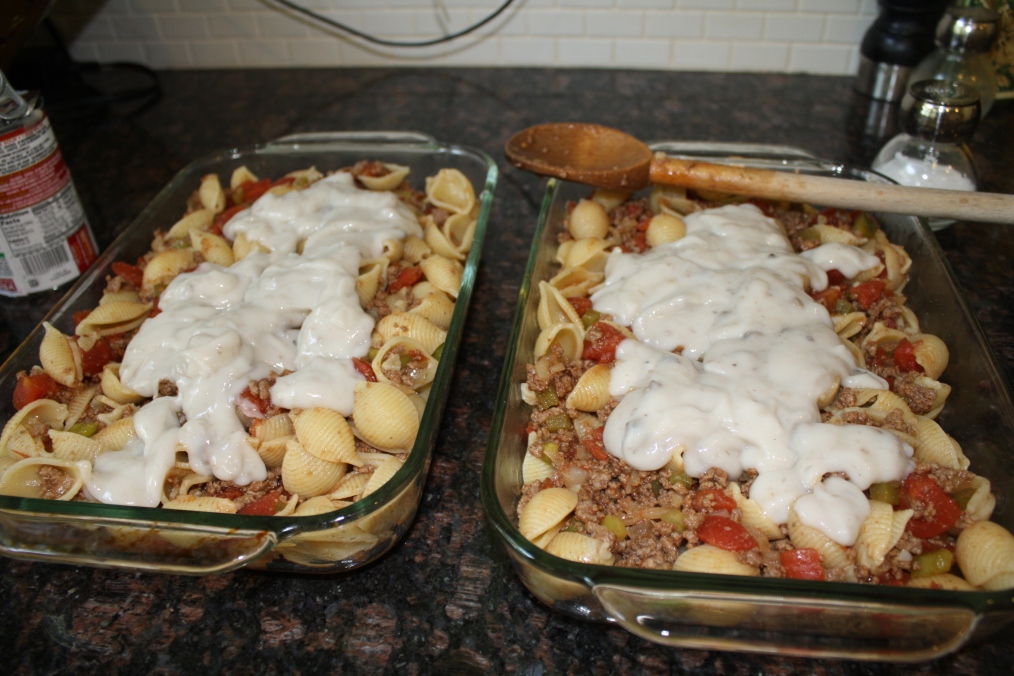
In the pictures below, I did double the recipe to make one for my dad, but the recipe below is the original for just one casserole.  I also included a pic of the recipe in my mom’s handwriting.  Makes me smile. 

  • 1 lb ground beef
  • 2 cups canned tomatoes ( 1 14.5 oz can is fine)
  • 1/4 cup finely chopped onion
  • 1 finely chopped green bell pepper
  • 1 tbsp ketchup
  • 1 tbsp Worcestershire sauce
  • salt
  • 1 can 98% fat-free cream of mushroom soup
  • 1/2 package of shell pasta
  • 1 cup shredded cheddar cheese

Preheat oven to 350.  In a heavy large skillet, brown ground beef; drain meat well and add back to pan.  Add onion, pepper, tomatoes, ketchup and Worcestershire sauce and salt to taste and simmer for 30 minutes.

While the meat simmers, cook pasta according to package directions.  Once the pasta is well-drained, add to the meat mixture and mix well.  If your skillet isn’t big enough, go ahead and move everything to a large baking dish to mix up.  If you were able to mix the pasta in the skillet, move the entire mixture to a large baking dish now.

Add the cream of mushroom soup and mix well, stirring up from the bottom.  Top with cheddar cheese and bake for 30 minutes.  Serve with green beans or a green salad.  Enjoy!

ImageImageImageImageImage

Pork Tenderloin with Pan Sauce

I saw this recipe on Pinterest and all of the comments of people raving made me want to try it.  I was especially interested that many moms posted that their kids LOVED this recipe and sure enough, it was so tender, even my 17-month old ate it!  My husband has already asked me to make this again this week, so I would call it a winner.

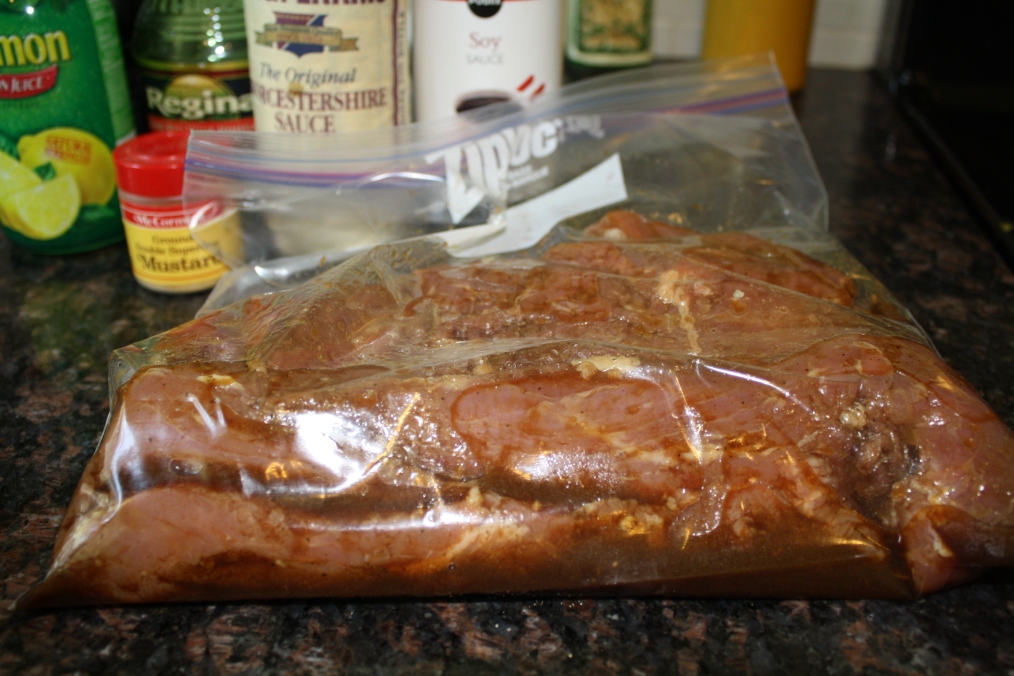
I adapted the recipe a bit for our taste, which is what I am listing below.  I will also paste the link to the original recipe.  The secret is to really let it marinate — great to prepare before work and then just cook when you’re ready.  I served it with baked apples and corn.

  • 1 – 2 lbs. pork tenderloin, trimmed of fat

Marinade:

  • 3 tbsp olive oil
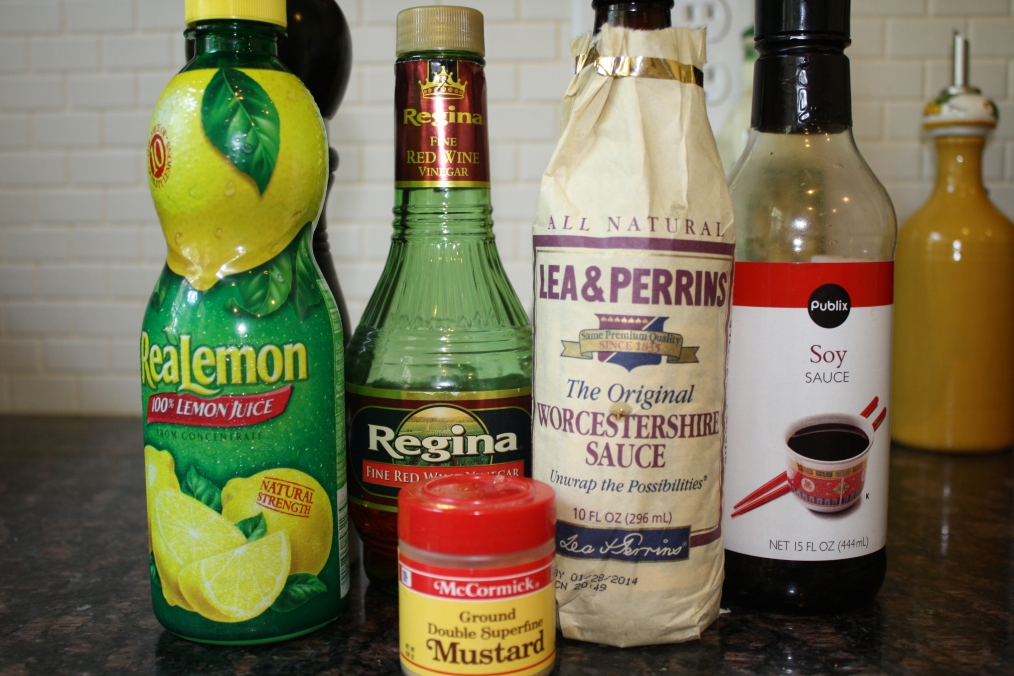
  • 2 tbsp soy sauce
  • 1 tbsp red wine vinegar
  • juice of a lemon or 1 tbsp bottled lemon juice
  • 2 tbsp Worcestershire sauce
  • 1 tsp dry mustard
  • several good cranks of black pepper (maybe 10)
  • 4 garlic cloves, minced

Pan Sauce

  • 1/2 cup chicken broth
  • 2-3 tbsp reserved marinade
  • small pat of butter

Combine all ingredients in a small bowl and whisk well.  Trim the pork tender of as much fat and silver skin as you can.  Place pork in a large Ziplock baggie and pour marinade over it, reserving about 2-3 tbsp for later.  Put in fridge and let marinate for up to 8 hours.

Preheat oven to 350 degrees.  Heat a large skillet over medium-high heat and sear the pork tender for 2 minutes on each side.  Make sure the skillet is good and hot before adding the meat.  No need to add oil to the skillet, the marinade has plenty.  Using tongs, move the tenderloin to an oven-safe dish and bake for about 40 minutes.

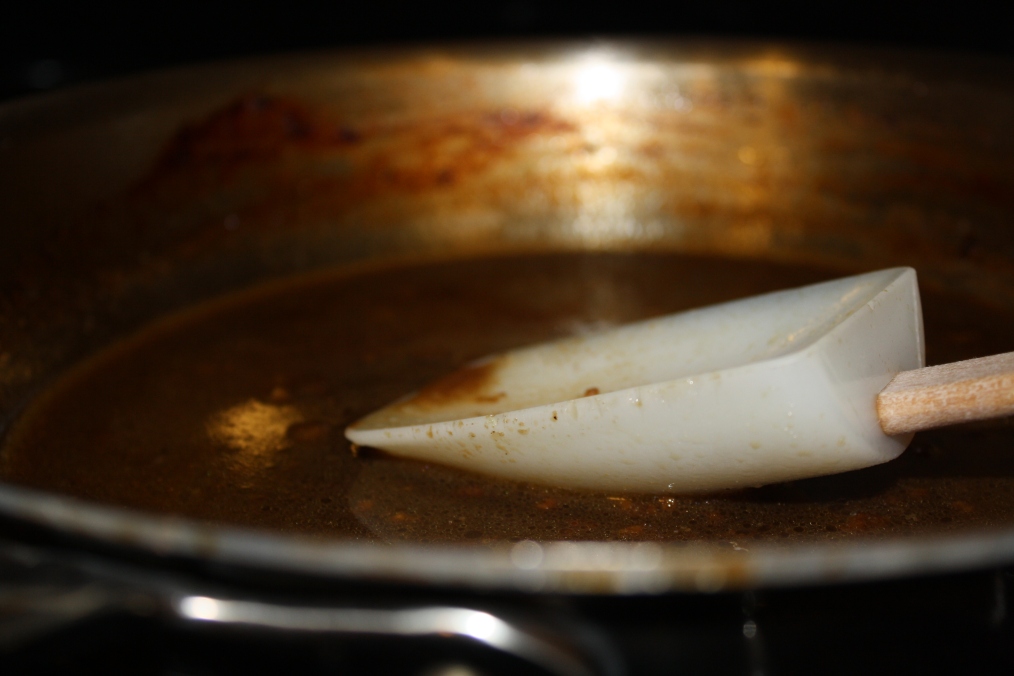
While the pork bakes, place the skillet back over medium heat, add 1/2 cup chicken broth and scrape the browned pieces off the bottom of the pan.  Add the reserved marinade (thoroughly mixed) and let boil down for about 3 minutes.  Add a small pat of butter, remove from heat and stir until butter has melted.

Slice the pork and serve with the pan sauce.

Original Source:

http://chefmommy-brandao.blogspot.ca/2012/03/pork-tenderloin-with-pan-sauce.html

ImageImageImageImageImageImageImage

Easy Weeknight Fajitas

Mexican is a go-to weeknight meal for us, but I like to change it up from the same ole taco salad every now and then.  Bring on the fajitas!  They are so easy, inexpensive and fairly healthy too.  Can’t beat that!


Weeknight Fajitas

  • 10″ or 12″ tortillas
  • 2 tbsp olive oil, divided
  • skinless boneless chicken, cut into strips*
  • green bell pepper, seeded and cut into strips
  • red bell pepper, seeded and cut into strips
  • yellow onion, sliced into rings and then strips
  •  1 pkg taco seasoning
  • cheese, taco sauce, sour cream to garnish (optional)

*many grocers package chicken already cut into strips ideal for fajitas or stir-fry, so look for those to save time.  Chicken cutlets also work well for this dish.

In a skillet, heat 1 tbsp olive oil over medium-high heat.  In a mixing bowl, mix up the peppers and onion with about 1/2 pkg of taco seasoning.  Add peppers and onion to pan and stir-fry until charred and soft, about 15-20 minutes, stirring and shaking often.  Reduce heat if needed.

While the vegetables cook, heat another skillet with the remaining olive oil at medium heat.  Season the chicken with the rest of the taco seasoning and cook over medium heat for 8-10 minutes, or until done.

While the chicken and veggies cook, heat the tortillas in the microwave.  Pile high with chicken and veggies, cheese, sour cream and taco sauce (fresh cilantro and guacamole are also great additions).

I serve these with a side of seasoned black beans, but you can also serve Mexican rice.  Oh, and a Corona, of course!


ImageImageImageImageImageImageImageImageImage

Open-faced blackened catfish sandwiches

I sm so excited that summer is here — one of my favorite seasons to be in the kitchen and enjoying the amazing produce available.  Frank and I love seafood of all kinds, especially fish.  I’m always on the lookout for new ways to prepare it since it’s such a quick, easy thing to fix on weeknights.  I found this recipe in June’s Cooking Light issue (one of my favorite sources for fresh and healthy recipes).

The fish was simple and delicious; we followed the recipe for the slaw, but would probably go back and use my own recipe for slaw when we make these again.  Overall, very good and very quick for a weeknight summertime meal.  Ididn’t get my own photo, but below is the one from the mag.  Doesn’t it look good?

(image from cookinglight.com)

  • catfish fillets
  • 2 teaspoons paprika
  • 3/4 teaspoon ground red pepper
  • 1 teaspoon oregano
  • 1/4 teaspoon salt
  • 1/4 teaspoon black pepper
  • olive oil
  • bag of carrot and cabbage slaw
  • 1/3 cup nonfat plain Greek yogurt
  • 1 tbsp honey
  • 3 tbsp fresh lime juice
  • 1 cup chopped fresh cilantro (from my herb garden!)
  • slices of sourdough bread, toasted

Combine first five ingredients in a small bowl.  Sprinkle over fish, coating well on both sides.  Heat cast iron skillet over high heat. Add oil to pan and swirl to coat.  Add fish and cook 4 minutes on each side or until done.

Combine yogurt, juice and honey in a large bowl; toss together with slaw and cilantro.

Top bread slices with slaw, fish and remaining slaw.

Smoked Paprika Pork Tenderloin with Succotash

Only two weeks to go in this long pregnancy journey.  One of the side effects I didn’t see coming was not really being into food very much…at least not new, interesting, untested food!  Most of what poor Frank has been eating over the last nine months have been the same comfort foods over and over again…hence, not much new blog material.

However, in celebration of reaching 37 weeks, I branched out last night and tried a new recipe that sounded good (for once) that I found in March’s Clean Eating magazine.  If you haven’t heard of this magazine, check it out.  A lot of the recipes are vegetarian, which doesn’t fly for Frank, but every now and then I find something we both really like.  This recipe was definitely one of them and when the veggies are fresh this summer, I bet it’s even better.  Definitely a do-over and super-easy.  Was ready in under 30 minutes (the magazine claims it only take 15 minutes, but I had to chop everything first).

 Paprika Pork Tenderloin with Succotash (adapted from Clean Eating, March 2011)

  • 1 pork tenderloin, trimmed of fat and sliced into about 12 medallions
  • 1 tsp cumin
  • 1 tsp paprika
  • 1 tsp olive oil
  • 1/2 tsp salt
  • 1/4 tsp black pepper
  • 1 cup frozen lima beans, thawed and drained
  • 1 cup of white corn niblets
  • 1 red bell pepper, seeded and chopped
  • 1 small white onion, diced
  • 2 tsp olive oil
  • chopped fresh cilantro (optional)

In a mixing bowl, use a whisk to blend together the rub for the pork tender (olive oil, paprika, cumin, S&P) and then toss the meat with the rub, coating well.  Seat bowl aside.

In a large skillet, heat 1 tsp olive oil to medium heat.  Saute the red pepper and onion for 3 minutes or until onion is translucent.  Add corn and lima beans, sauteing another 3 minutes or until heated through.  Pour mixture into another mixing bowl, toss with healthy dash of S&P to taste and cilantro (optional) and set aside, keeping warm.

Wipe out pan and heat last tsp of olive oil to medium heat.  Add pork medallions and cook about 3 minutes on both sides or until done.

To serve, spoon succotash onto plate and then place 2-3 pork medallions on top.  Can also spoon a little of the pan juices over the pork if desired.  Serve with a side salad and crunchy roll. 

Will be PERFECT for summer!

Apple Pumpkin Muffins

Someone recently brought my mother a loaf of homemade pumpkin bread and after I inhaled most of it, I can’t get pumpkin-flavored foods off the brain.  I’m just so excited fall is here — the mums and  fairy tale pumpkins (my new thing) and crisp air and football, all fabulous.

I saw these muffins on my friend Jen’s blog and while she is a master baker and takes much better photography than I do, these were still delicious.  I need to figure out how to get the nice rounded tops to the muffins like hers (maybe it’s my aversion to the word ‘muffin top?’)  I think it might have to do with the fact that I accidentally used a whole can of pumpkin instead of a half can, but oh well.  They were still fabulous.   And best of all, they were a healthy adapation from a more indulgent recipe, making them a relatively healthy choice for breakfast. 

Apple Pumpkin Muffins

  • 1 cup all purpose flour
  • 1/2 cup of whole wheat flour
  • 1 teaspoon baking soda
  • 1/2 teaspoon salt
  • 1 teaspoon cinnamon
  • 1/2 teaspoon nutmeg
  • small pinch of ground cloves
  • 1/2 can of pumpkin puree
  • 1/4 cup of applesauce
  • 3 tablespoons of vegetable oil
  • 1 cup brown sugar
  • 2 eggs, lightly beaten
  • 1 apple, peeled and chopped

Preheat oven to 350 and line muffin tin.  In a large bowl, whisk the dry ingredients (flours down through the ground cloves).  In a medium bowl, whisk the pumpkin, applesauce, oil, sugar, and eggs together, blending well.

Add the pumpkin mixture to the dry ingredients, whisking well until completely blended.  Fold in apple.

Fill the muffin tins up about 3/4 full and sprinkle with a little more cinnamon and brown sugar if desired.  Bake for 23 minutes, or until a toothpick comes out clean.  Cool completely before removing from wrapper.

Grilled Rosemary Chicken

I adapted this recipe from my friend Jen’s great cooking blog, bakinandeggs.com, who I believe also adapted it from a recipe she found elsewhere.  Needless to say, it’s really good and simple.  The marinade includes a little honey and the natural sugars found in honey really make the chicken brown nicely.  Plus, you know I can’t pass up an opportunity to showcase my herbs from my beloved herb garden.

Make this part of your summer grilling repertoire.  I think I threw in some grilled okra (tossed with olive oil, Cavendars Greek Seasoning and pepper — thanks, Amanda!) and a fresh fruit salad to round out this summer meal.

Prepare the marinade before work and when you get home, it will be perfect and ready for the grill.  Remember to  remove the chicken and let it sit out at room temp for about 10-15 minutes before grilling.  This helps the meat cook more evenly.  If it’s too cold, the inside won’t always get cooked through before the outside is charred.

Grilled Rosemary Chicken


  • 2 tablespoons honey
  • 2 tablespoons dijon mustard
  • 1 tablespoon olive oil
  • 1 teaspoon red wine vinegar
  • 2 garlic cloves, finely minced
  • little salt
  • as much fresh rosemary, finely chopped, as you want
  • 2-4 chicken breasts

In a small bowl, whisk together the marinade.  Place the chicken breasts in a ziplock baggie and pour the marinade over it, turning several times to coat well.  Chill for about 8 hours.

Heat grill to medium heat, about 350-375.  Grill chicken until desired doneness, about 10 minutes on either side, depending on how thick the chicken is.

Grilled Zucchini Spears with Fresh Mint

It’s been a slow few weeks for the blog.  We’ve been on vacation and in all honesty, making a lot of the same dinners that are already on here.  Life has been hectic, to say the least, but that is no excuse to not cook, especially this time of year.  I love this time of year, with the all the beautiful Alabama produce.  We’ve been enjoying fresh corn, okra and tomatoes and here, zucchini.

These are super-simple and make a great, healthy, cheap and fast side-dish.  Can’t beat that!

  • Several zucchini, washed with both ends trimmed
  • tablespoon olive oil
  • S&P
  • fresh mint leaves, torn

Preheat grill to 350.  Wash zucchini and trim both ends off.  Slice zucchini lengthwise into spears.  Place on cookie sheet and drizzle olive oil over the veggies, coating well.  Shake a healthy amount of salt and pepper onto the veggies and grill for 10 minutes or so, until tender.

Garnish with fresh mint leaves.  Serve with pan-fried chicken (find that recipe here) and a fresh salad or slaw.

Ham Delights

Last week, I hosted  a baby shower for two friends at our house.  Two moms, three babies.  A set of twin girls and baby boy!  I can’t wait for them to be here!  In typical fashion with this group,  the shower was really more of a cocktail party than a traditional baby shower.  The moms-to-be were good sports, sipping their Perriers, as the party went on around them.  Love those girls!

I decided to make these little bite-size ham biscuit things my mom makes for the party — it was in the evening and called for heavier hor d’oeuvres than I probably would have done during the day.  They are really simple to make, and so good.  It’s basically ham and swiss with melted butter poured over them.  The ultimate comfort food.  They are also great for a party because you can pile them up on a tray, making them great finger food!  Put these on the list for your next get-together.  I know it’s like a zillion degrees outside, but these are great for winter holiday parties as well. 

  • 2 packages of small party rolls (try finding them at the Pig; Pepperidge Farm makes good ones.  look for the kind that come in an aluminum tray, wrapped in plastic)
  • 1 lb very thinly shaved ham
  • 1 package of shredded swiss cheese
  • 1/2 stick butter
  • 1/4 onion, very finely chopped
  • 2 tbsp mustard
  • 1 splash worchestershire
  • 1 – 2 tbsp poppyseeds

Preheat oven to 350.  Take the rolls out of the package and using a bread knife, cut the rolls in half, treating them as one large roll.  Top the bottom roll with ham and then swiss.  Put the top of the roll back on and put the rolls back into the aluminum tray they came in.  Cut the individual rolls at this point, now that they are back together in the package. 

In a small saucepan, melt the butter and the rest of the ingredients together over low heat and whisk well until thoroughly melted and mixed.  Pour the mixture over the rolls, using a brush or spatula to cover the top of the rolls well. 

Bake for 15-20 minutes until golden on the top.  Serve immediately while hot.